Introduction
It’s been almost two and a half years since I’ve updated this website. While I was away, GitHub Actions was released and Hugo jumped from version 0.31 to 0.70! My old Hugo code no longer builds and instead of updating incrementally, I decided it was easier to just rebuild from scratch with the latest version. At the same time, I would update the theme1 I use and integrate GitHub Actions to replace the now-unnecessary deployment script 23.
I used the Hugo Quick Start guide4 for the initial setup and then some helpful articles567 for the GitHub Actions setup. I did, however, stumble a few times because some steps or details were missing, so I wrote this step-by-step, end-to-end guide that is a compilation of the aforementioned resources.
Overview and Plan
We’re going to store our code on the master branch and the generated site on the gh-pages branch. If you don’t already have Hugo installed8, Git installed, and your GitHub SSH account key9 configured, you should take care of that before proceeding.
The final repo is available at https://github.com/charlesjlee/hugo-github-pages-actions-demo
1) Create and configure GitHub repo
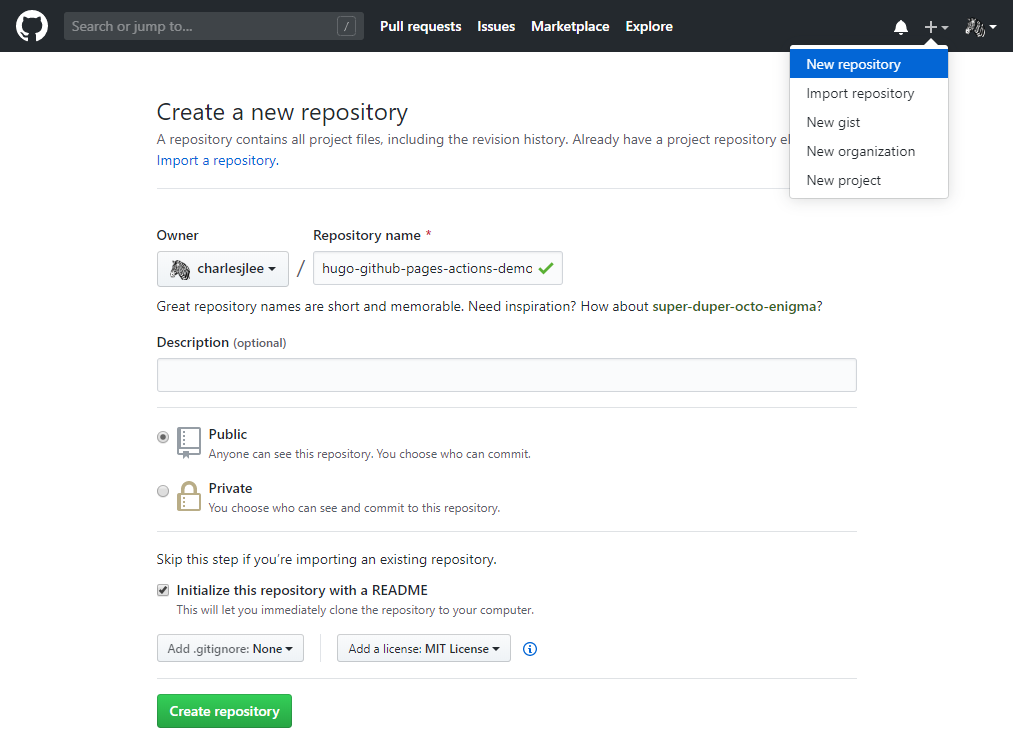
Navigate to + in the upper right-hand to find New repository, fill out the form, and click Create repository.
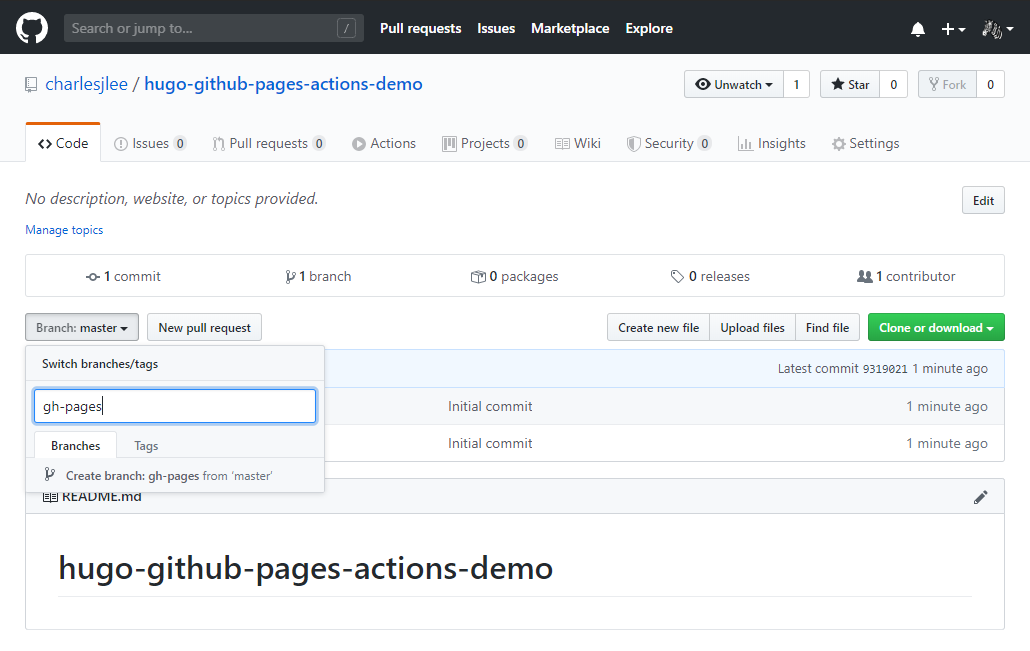
Click Branch: master ▾ on the left side, type gh-pages into the text field, and click Create branch: gh-pages from ‘master’ to create the branch.
Since we named our branch gh-pages, GitHub Pages automatically designated this branch as our Source, so we don’t need to set this ourselves. You can confirm this by navigating to ⚙ Settings and then scrolling all the way to down to the GitHub Pages section. This also means that our site is now live at https://{user}.github.io/{repo}/, where {user} and {repo} are replaced with your GitHub username and repo name. If you navigate there now, the only thing you’ll see is the contents of README.md like below because we just branched gh-pages from an empty master.

2) Develop on repo locally
Our repo is now ready to use. We’re going to clone master locally so we can setup and test our site.
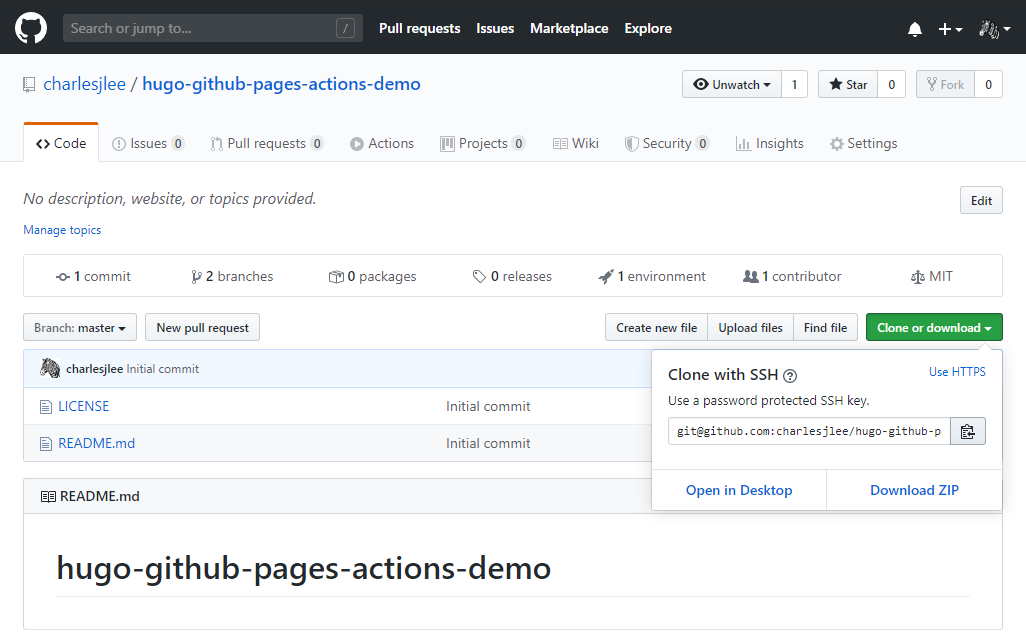
If you’re not on the master branch, use the Branch dropdown on the left side to switch to the master branch. Click the green Clone or download button on the right side, then click the clipboard 📋 icon to copy the path.
Now open a shell (e.g. PowerShell, bash) in the directory where you want to work and clone master. In the example below, I’m using PowerShell and C:\Hugo as my directory. The path for git clone should be in your clipboard from the previous step.
PS C:\Hugo> git clone git@github.com:charlesjlee/hugo-github-pages-actions-demo.git
Cloning into 'hugo-github-pages-actions-demo'...
remote: Enumerating objects: 4, done.
remote: Counting objects: 100% (4/4), done.
remote: Compressing objects: 100% (3/3), done.
remote: Total 4 (delta 0), reused 0 (delta 0), pack-reused 0
Receiving objects: 100% (4/4), done.
Next, we’ll use hugo new site to create a new site. This command will create the folders and files that Hugo needs to function. Since our project directory already exists, we have to pass the –force and make sure that the site name matches the repo name.
PS C:\Hugo> hugo new site hugo-github-pages-actions-demo --force
Congratulations! Your new Hugo site is created in C:\Hugo\hugo-github-pages-actions-demo.

Just a few more steps and you're ready to go:

1. Download a theme into the same-named folder.
   Choose a theme from https://themes.gohugo.io/ or
   create your own with the "hugo new theme <THEMENAME>" command.
2. Perhaps you want to add some content. You can add single files
   with "hugo new <SECTIONNAME>\<FILENAME>.<FORMAT>".
3. Start the built-in live server via "hugo server".

Visit https://gohugo.io/ for quickstart guide and full documentation.
Then we’ll move into our repo and download the ananke theme.
PS C:\Hugo> cd hugo-github-pages-actions-demo
PS C:\Hugo\hugo-github-pages-actions-demo> git submodule add https://github.com/budparr/gohugo-theme-ananke.git themes/ananke
Cloning into 'C:/Hugo/hugo-github-pages-actions-demo/themes/ananke'...
remote: Enumerating objects: 23, done.
remote: Counting objects: 100% (23/23), done.
remote: Compressing objects: 100% (22/22), done.
remote: Total 1636 (delta 6), reused 8 (delta 1), pack-reused 1613
Receiving objects: 100% (1636/1636), 4.23 MiB | 13.50 MiB/s, done.
Resolving deltas: 100% (897/897), done.
To configure our site to use the newly downloaded theme, we need to add the line theme = “ananke” to our site’s configuration file config.toml. You can do this by opening config.toml in a text editor, adding the line, and saving the file. We also need to update baseURL and enable relativeURLs. When you’re done, config.toml should look like this:
baseURL = "/"
languageCode = "en-us"
title = "My New Hugo Site"
theme = "ananke"
relativeURLs = true
We now have the minimum we need to create a barebones website. You can see the current state of the site by running hugo server -D and then going to http://localhost:1313/ in your browser. We’ll use the -D flag momentarily.
PS C:\Hugo\hugo-github-pages-actions-demo> hugo server -D
Building sites …
                   | EN
-------------------+-----
  Pages            |  7
  Paginator pages  |  0
  Non-page files   |  0
  Static files     |  3
  Processed images |  0
  Aliases          |  0
  Sitemaps         |  1
  Cleaned          |  0

Built in 25 ms
Watching for changes in C:\Hugo\hugo-github-pages-actions-demo\{archetypes,content,data,layouts,static,themes}
Watching for config changes in C:\Hugo\hugo-github-pages-actions-demo\config.toml
Environment: "development"
Serving pages from memory
Running in Fast Render Mode. For full rebuilds on change: hugo server --disableFastRender
Web Server is available at http://localhost:1313/ (bind address 127.0.0.1)
Press Ctrl+C to stop
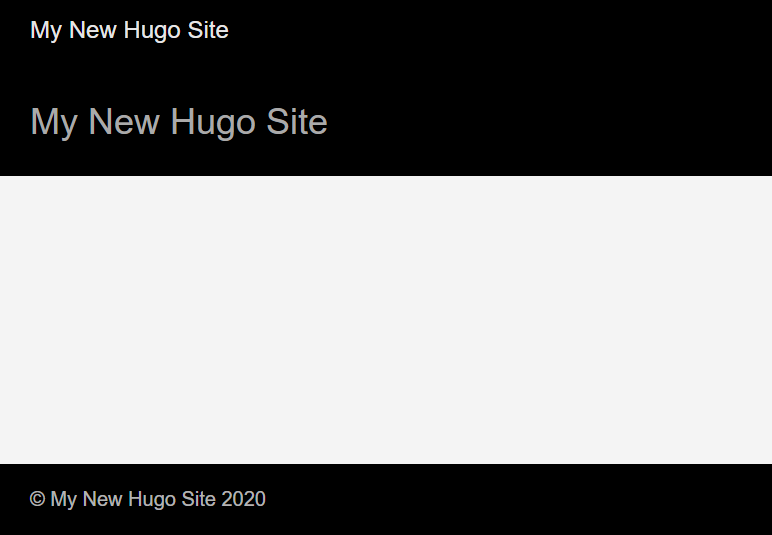
Your site will look like this: no content and title text still set to the default.
Notice above that hugo server -D said it was “watching for changes”. This allows us to add/update/modify files and watch the site change in real-time. With hugo server -D still running in your shell, open config.toml and change the value of title. You should see this change reflected immediately in the site.
Let’s a create a new post using hugo new in a separate shell. We should see this post appear immediately when we revisit the site. hugo new is just a convenience function for creating stubs for posts; you can also create these by hand. If you don’t see your post appear on your site, it’s probably because new posts are created with draft: true and you forgot to run hugo new with the -D flag.
PS C:\Hugo\hugo-github-pages-actions-demo> hugo new posts/my-first-post.md
C:\Hugo\hugo-github-pages-actions-demo\content\posts\my-first-post.md created
This is a good time to commit our code
PS C:\Hugo\hugo-github-pages-actions-demo> git status
On branch master
Your branch is up to date with 'origin/master'.

Changes to be committed:
  (use "git restore --staged <file>..." to unstage)
        new file:   .gitmodules
        new file:   themes/ananke

Untracked files:
  (use "git add <file>..." to include in what will be committed)
        archetypes/
        config.toml
        content/

PS C:\Hugo\hugo-github-pages-actions-demo> git add .
PS C:\Hugo\hugo-github-pages-actions-demo> git commit -m 'first commit'
[master eec6d9e] first commit
 5 files changed, 19 insertions(+)
 create mode 100644 .gitmodules
 create mode 100644 archetypes/default.md
 create mode 100644 config.toml
 create mode 100644 content/posts/my-first-post.md
 create mode 160000 themes/ananke
PS C:\Hugo\hugo-github-pages-actions-demo> git push
Enumerating objects: 11, done.
Counting objects: 100% (11/11), done.
Delta compression using up to 12 threads
Compressing objects: 100% (6/6), done.
Writing objects: 100% (10/10), 980 bytes | 980.00 KiB/s, done.
Total 10 (delta 0), reused 0 (delta 0), pack-reused 0
To github.com:charlesjlee/hugo-github-pages-actions-demo.git
   9319021..eec6d9e  master -> master
Now let’s talk about deployment. Executing hugo will build your site and put it into a new directory named public. You could then just “simply” commit the contents of public to the gh-pages branch. Actually doing this requires a couple of different steps so people back in the day scripted this process23 and even deployed their script, e.g. on Netlify, so it ran automatically on a commit to master. GitHub Actions takes care of both of these steps (watching for a commit to master, building the site and committing to gh-pages) and staying within the GitHub ecosystem means our setup will be simpler than if we used a third-party service or manually ran a script.
3) Use GitHub Actions to deploy
We enable GitHub Actions by creating a file in the .github/workflows directory. First though, we’ll need to add a “secret” to our repo that is proof that the holder is authorized to make changes to the repo. We can do this by creating a “deploy key”, which is an SSH key similar to our “account key” but only grants access to a single repo.
Generate an RSA (private, public) key-pair and save it to the files (master, master.pub). We won’t be committing these files, so you can do this in any directory.
PS C:\Hugo> ssh-keygen -t rsa -b 4096 -C "$(git config user.email)" -f master -N '""'
Generating public/private rsa key pair.
Your identification has been saved in master.
Your public key has been saved in master.pub.
The key fingerprint is:
SHA256:iRd5eMCgndRLWlQuUtD4Z5ep/pmneBGxiK+GHiKKOA4 charleslee592@gmail.com
The key's randomart image is:
+---[RSA 4096]----+
|      +O+..      |
|     +.o*=  .    |
|    . +==o+. =   |
|      .o+*+ *    |
|      . S+ o .   |
|       .  o .    |
|E . . .. o   .   |
|=. . ...o ...o.  |
|=o   ...  .o=o   |
+----[SHA256]-----+
Open your repo in GitHub and navigate to ⚙ Settings –> Secrets –> New secret. Name should be ACTIONS_DEPLOY_KEY and Value should be the contents of the file named master.

Then navigate to ⚙ Settings –> Deploy keys –> Add deploy key. Title should be ACTIONS_DEPLOY_KEY, Key should be the contents of the file named master.pub, and Allow write access should be checked.
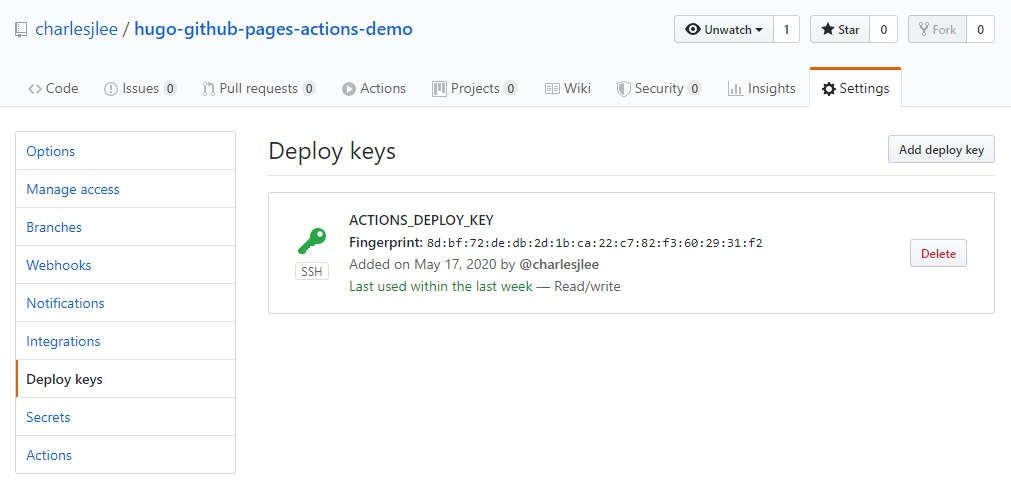
After the above two steps are done, you should delete master and master.pub. We won’t need them anymore and they’re dangerous to leave sitting around because someone who gets a hold of the private key master might be able to deploy to your repo.
Next, we create the workflow directory and file. I used ni to create the file but you might need touch. We’re calling the file deploy.yml but the YML file can be named anything.
PS C:\Hugo\hugo-github-pages-actions-demo> mkdir .github/workflows
PS C:\Hugo\hugo-github-pages-actions-demo> ni .github/workflows/deploy.yml
Open deploy.yml in a text editor, paste in the below, and save. There are a couple things you’ll need to change, but first let’s unpack this by describing what’s going on in English:
“When a push is made to this branch, i.e. master, execute a job named deploy inside of a container running the ubuntu-18.04 OS. This job is composed of five ordered steps: (1) checking out the code in master, (2) checking out the code for our themes, (3) setting up Hugo to run in the next step, (4) running hugo to build our site, (5) deploying the contents of ./public into gh-pages”
name: CI
on: push
jobs:
  deploy:
    runs-on: ubuntu-18.04
    steps:
      - name: Git checkout
        uses: actions/checkout@v2

      - name: Update theme
        run: git submodule update --init --recursive

      - name: Setup hugo
        uses: peaceiris/actions-hugo@v2
        with:
          hugo-version: "0.70.0"

      - name: Build
        # run: hugo --minify
        run: hugo

      - name: Deploy
        uses: peaceiris/actions-gh-pages@v3
        with:
          deploy_key: ${{secrets.ACTIONS_DEPLOY_KEY}}
          external_repository: charlesjlee/hugo-github-pages-actions-demo
          publish_dir: ./public
          user_name: Charles Lee
          user_email: charleslee592@gmail.com
          publish_branch: gh-pages
          # cname: www.charlesjlee.com
Required Changes
| Field Name | Valid Value |
|---|---|
| external_repository | this should be {username}/{repo_name} |
| user_name | this can be anything, but it would make sense to match what you use when committing to master |
| user_email | ditto |
Optional Changes
| Description | Comment |
|---|---|
| hugo-version | I use 0.70.0. You should use whichever version of hugo you have running locally to avoid situations where local vs remote behavior don't match |
| hugo --minify | this will minify the HTML output generated by 'hugo' by removing comments and whitespace. This may lead to performance improvements, but will make the HTML output difficult to read and debug |
| cname | set this if you are using a custom domain. see this post for details https://www.charlesjlee.com/post/20200516-github-pages-dns/ |
Let’s commit this file and see our workflow in action.
PS C:\Hugo\hugo-github-pages-actions-demo> git status
On branch master
Your branch is up to date with 'origin/master'.

Untracked files:
  (use "git add <file>..." to include in what will be committed)
        .github/

nothing added to commit but untracked files present (use "git add" to track)
PS C:\Hugo\hugo-github-pages-actions-demo> git add .; git commit -m 'create deploy workflow'
[master e4f9020] create deploy workflow
 1 file changed, 31 insertions(+)
 create mode 100644 .github/workflows/deploy.yml
PS C:\Hugo\hugo-github-pages-actions-demo> git push
Enumerating objects: 6, done.
Counting objects: 100% (6/6), done.
Delta compression using up to 12 threads
Compressing objects: 100% (3/3), done.
Writing objects: 100% (5/5), 766 bytes | 766.00 KiB/s, done.
Total 5 (delta 1), reused 0 (delta 0), pack-reused 0
remote: Resolving deltas: 100% (1/1), completed with 1 local object.
To github.com:charlesjlee/hugo-github-pages-actions-demo.git
   dc1e177..e4f9020  master -> master
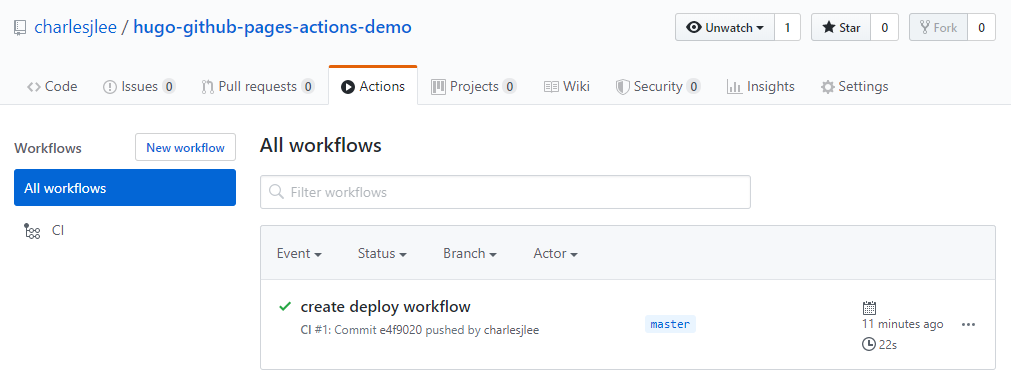
After you push this commit, the workflow will kick-off immediately. You can get an overview by navigating to the ⯈ Actions section of your repo.
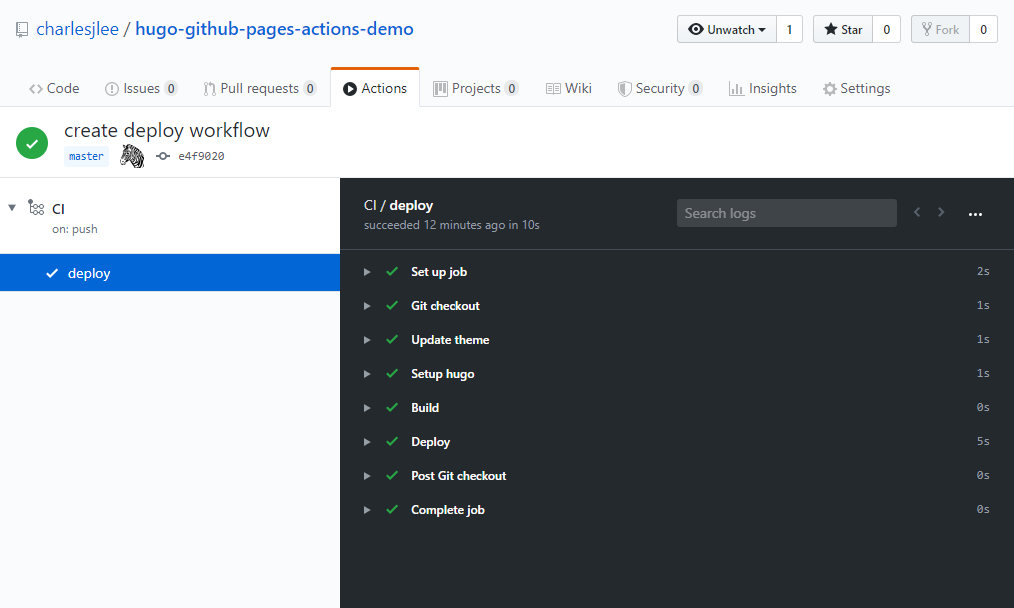
For logs on a specific run, you can click the workflow’s name, then click the job’s name on the left, e.g. deploy in our case.
The End
You’re done! You now have a setup that makes it easy to both test changes locally and deploy remotely. For reference, this repo contains all the changes up to this point and is ready to fork and use: https://github.com/charlesjlee/hugo-github-pages-actions-demo
The site is looking a bit bare though. Some things you can explore further:
- the post we made earlier, my-first-post.md, doesn’t appear on our site because it has the draft flag enabled. Delete that flag to enable the post
- make more posts!
- explore and try out different themes10. It’s even possible to layer multiple themes
- learn about Hugo Templating11 and how to customize aka override themes
- buy and configure a custom domain12. I have a post on configuring the DNS13
References
- https://github.com/yoshiharuyamashita/blackburn
- https://gohugo.io/hosting-and-deployment/hosting-on-github/#put-it-into-a-script-1
- https://github.com/charlesjlee/hugo-publish-to-ghpages-powershell
- https://gohugo.io/getting-started/quick-start/
- https://ruddra.com/posts/hugo-deploy-static-page-using-github-actions/
- https://medium.com/@asishrs/automate-your-github-pages-deployment-using-hugo-and-actions-518b959a51f9
- https://blog.kye.dev/hugo-github-pages-actions/
- https://gohugo.io/getting-started/installing
- https://help.github.com/en/github/authenticating-to-github/connecting-to-github-with-ssh
- https://themes.gohugo.io/
- https://gohugo.io/templates/
- https://help.github.com/en/github/working-with-github-pages/configuring-a-custom-domain-for-your-github-pages-site
- https://www.charlesjlee.com/post/20200516-github-pages-dns/