Opportunity for automation
After a 7-year hiatus, I recently started folding origami again and decided to focus on tessellations and modulars. I used to fold mostly representational models, i.e. animals and humans, and wanted to explore some new areas. Luckily for me, origami advanced greatly while I was away and the first good books on tessellations1 and wireframe modulars2 were published by Eric Gjerde and Byriah Loper, respectively. I bought both books, dove straight into making models, and immediately found myself repeating the same steps hundreds of times.
The majority of tessellations start with a precreased grid of squares or triangles (32x32 is common). There is no fun in spending 1h+ folding a grid every time you want to try a tessellation model. Similarly, modulars require tedious and repetitive prework before you can start the real fun of assembling. Modular prework comes in two forms: cutting paper into the correct proportions and then folding each unit. As even moderately complex models can require more than 100 pieces, prework is a major component of folding modulars. Cutting and folding the same unit 100 times is no fun.
On his website, Gjerde acknowledges this plight of the lazy3:
[N]obody necessarily likes pre-creasing grids, including me. So you’re not alone there. However, I think it’s important to think of it more as a meditative process, and instead of as a chore; it’s a task which you must do to fold a model, and it is, to some extent, an integral part of the model, so it’s worth taking the time to do it well and not rush through it to “get it out of the way”
I actually do have a meditation practice and I’d rather keep these two interests separate. In the interest of spending more time learning new models and techniques and less time on repetitive work, I looked at some options. My motivating factors for exploring automated cutting/precreasing are:
- Reduce time spent cutting and precreasing
- Increase accuracy
- Remove unsightly creases. Folders typically go to some length to avoid revealing unsightly creases in their completed models, but the de facto convention for tessellations has been to show the precreased grid
- Some models require computer-assisted precreasing, e.g. Jun Mitani’s work4; creasing curves by hand is difficult to do cleanly
Lasers and cutting plotters5
Not surprisingly, I’m not the first person to explore computer-assisted precreasing: just a few months Origami USA published an article6 on this topic. Some Googling told me that the two options people go with are laser cutters and cutting plotters. Lasers are unarguably the superior machine – they are faster and more accurate – so I looked at them first.
Buying a laser cutter was out of the questions because low-end models start at \$3k. There are low-cost Chinese models for ~\$400, but they require extensive tuning and troubleshooting I’d rather not deal with. That left renting or using a shared laser as my last option. I checked out a local maker space7 and found that to use the laser, I had to take the training course for \$75 and then could either:
- Come in during open hours and pay-per-minute for the laser
- Become a member for \$110/month, which would grant me 24/7 access to the space
The problem with option 1 is the lack of flexibility. As a complete neophyte, I know I’ll need to run the same job over-and-over with different parameters until I get it right. This will be difficult if there are other people competing for laser time (I didn’t try this, maybe there is no wait during open hours). I also can’t just try out ideas when I have them; I have to trek over to the lab. Option 2 is cost prohibitive.
Given the high cost and availability constraints of using a laser, I moved onto investigating cutting plotters. There aren’t that many choices for consumer-level cutting plotters and I quickly settled on the Silhouette Cameo. It seems to be the most popular choice among folders and Jun Mitani recommends the Cameo in his book 3D Origami Art. At \$250, I felt comfortable buying and trying the Cameo. If it didn’t work out, I could cut some vinyl and make some t-shirts (what most people use the Cameo for) or just sell the machine.
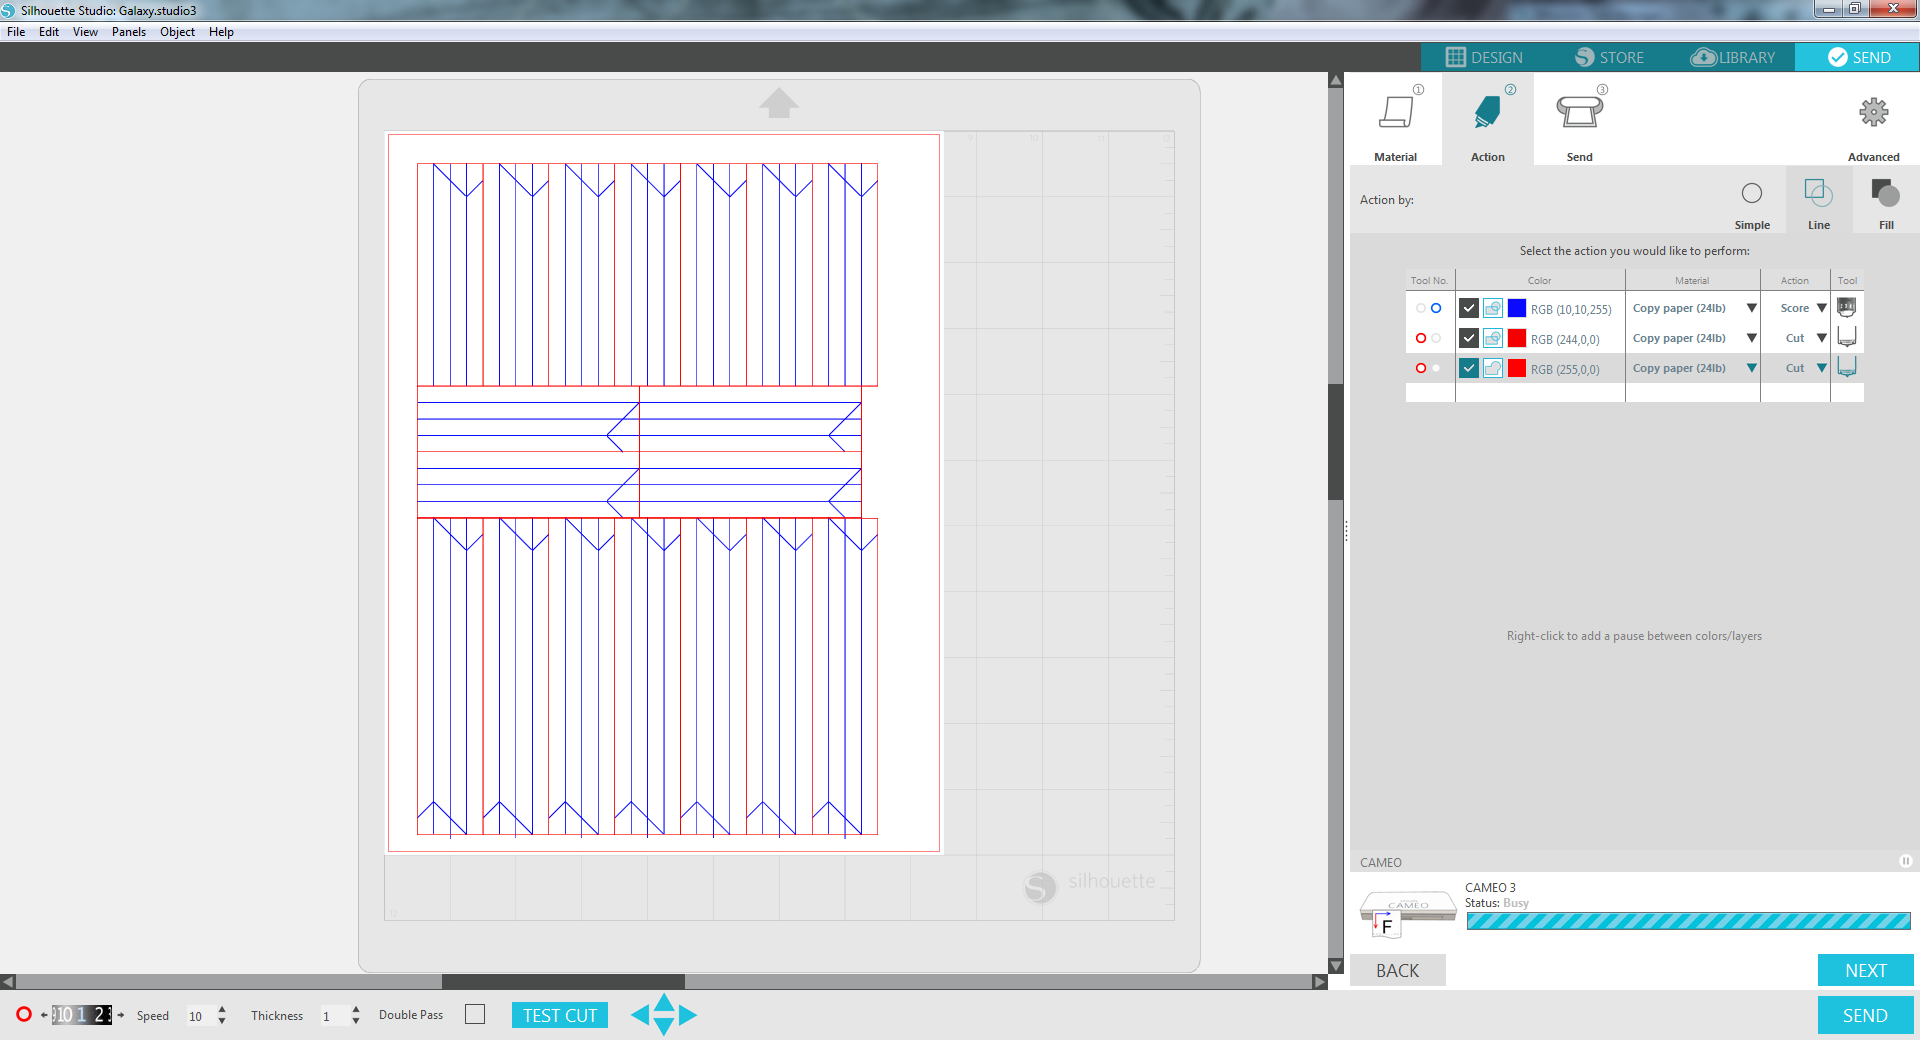
Using the Silhouette Cameo
The Cameo comes with a manual on features the machine and software has but no tutorial on how to actually run a job beyond just “load and run”. I had to watch a few Youtube videos to get a feel for the proprietary software and how to properly load the mat into the Cameo.
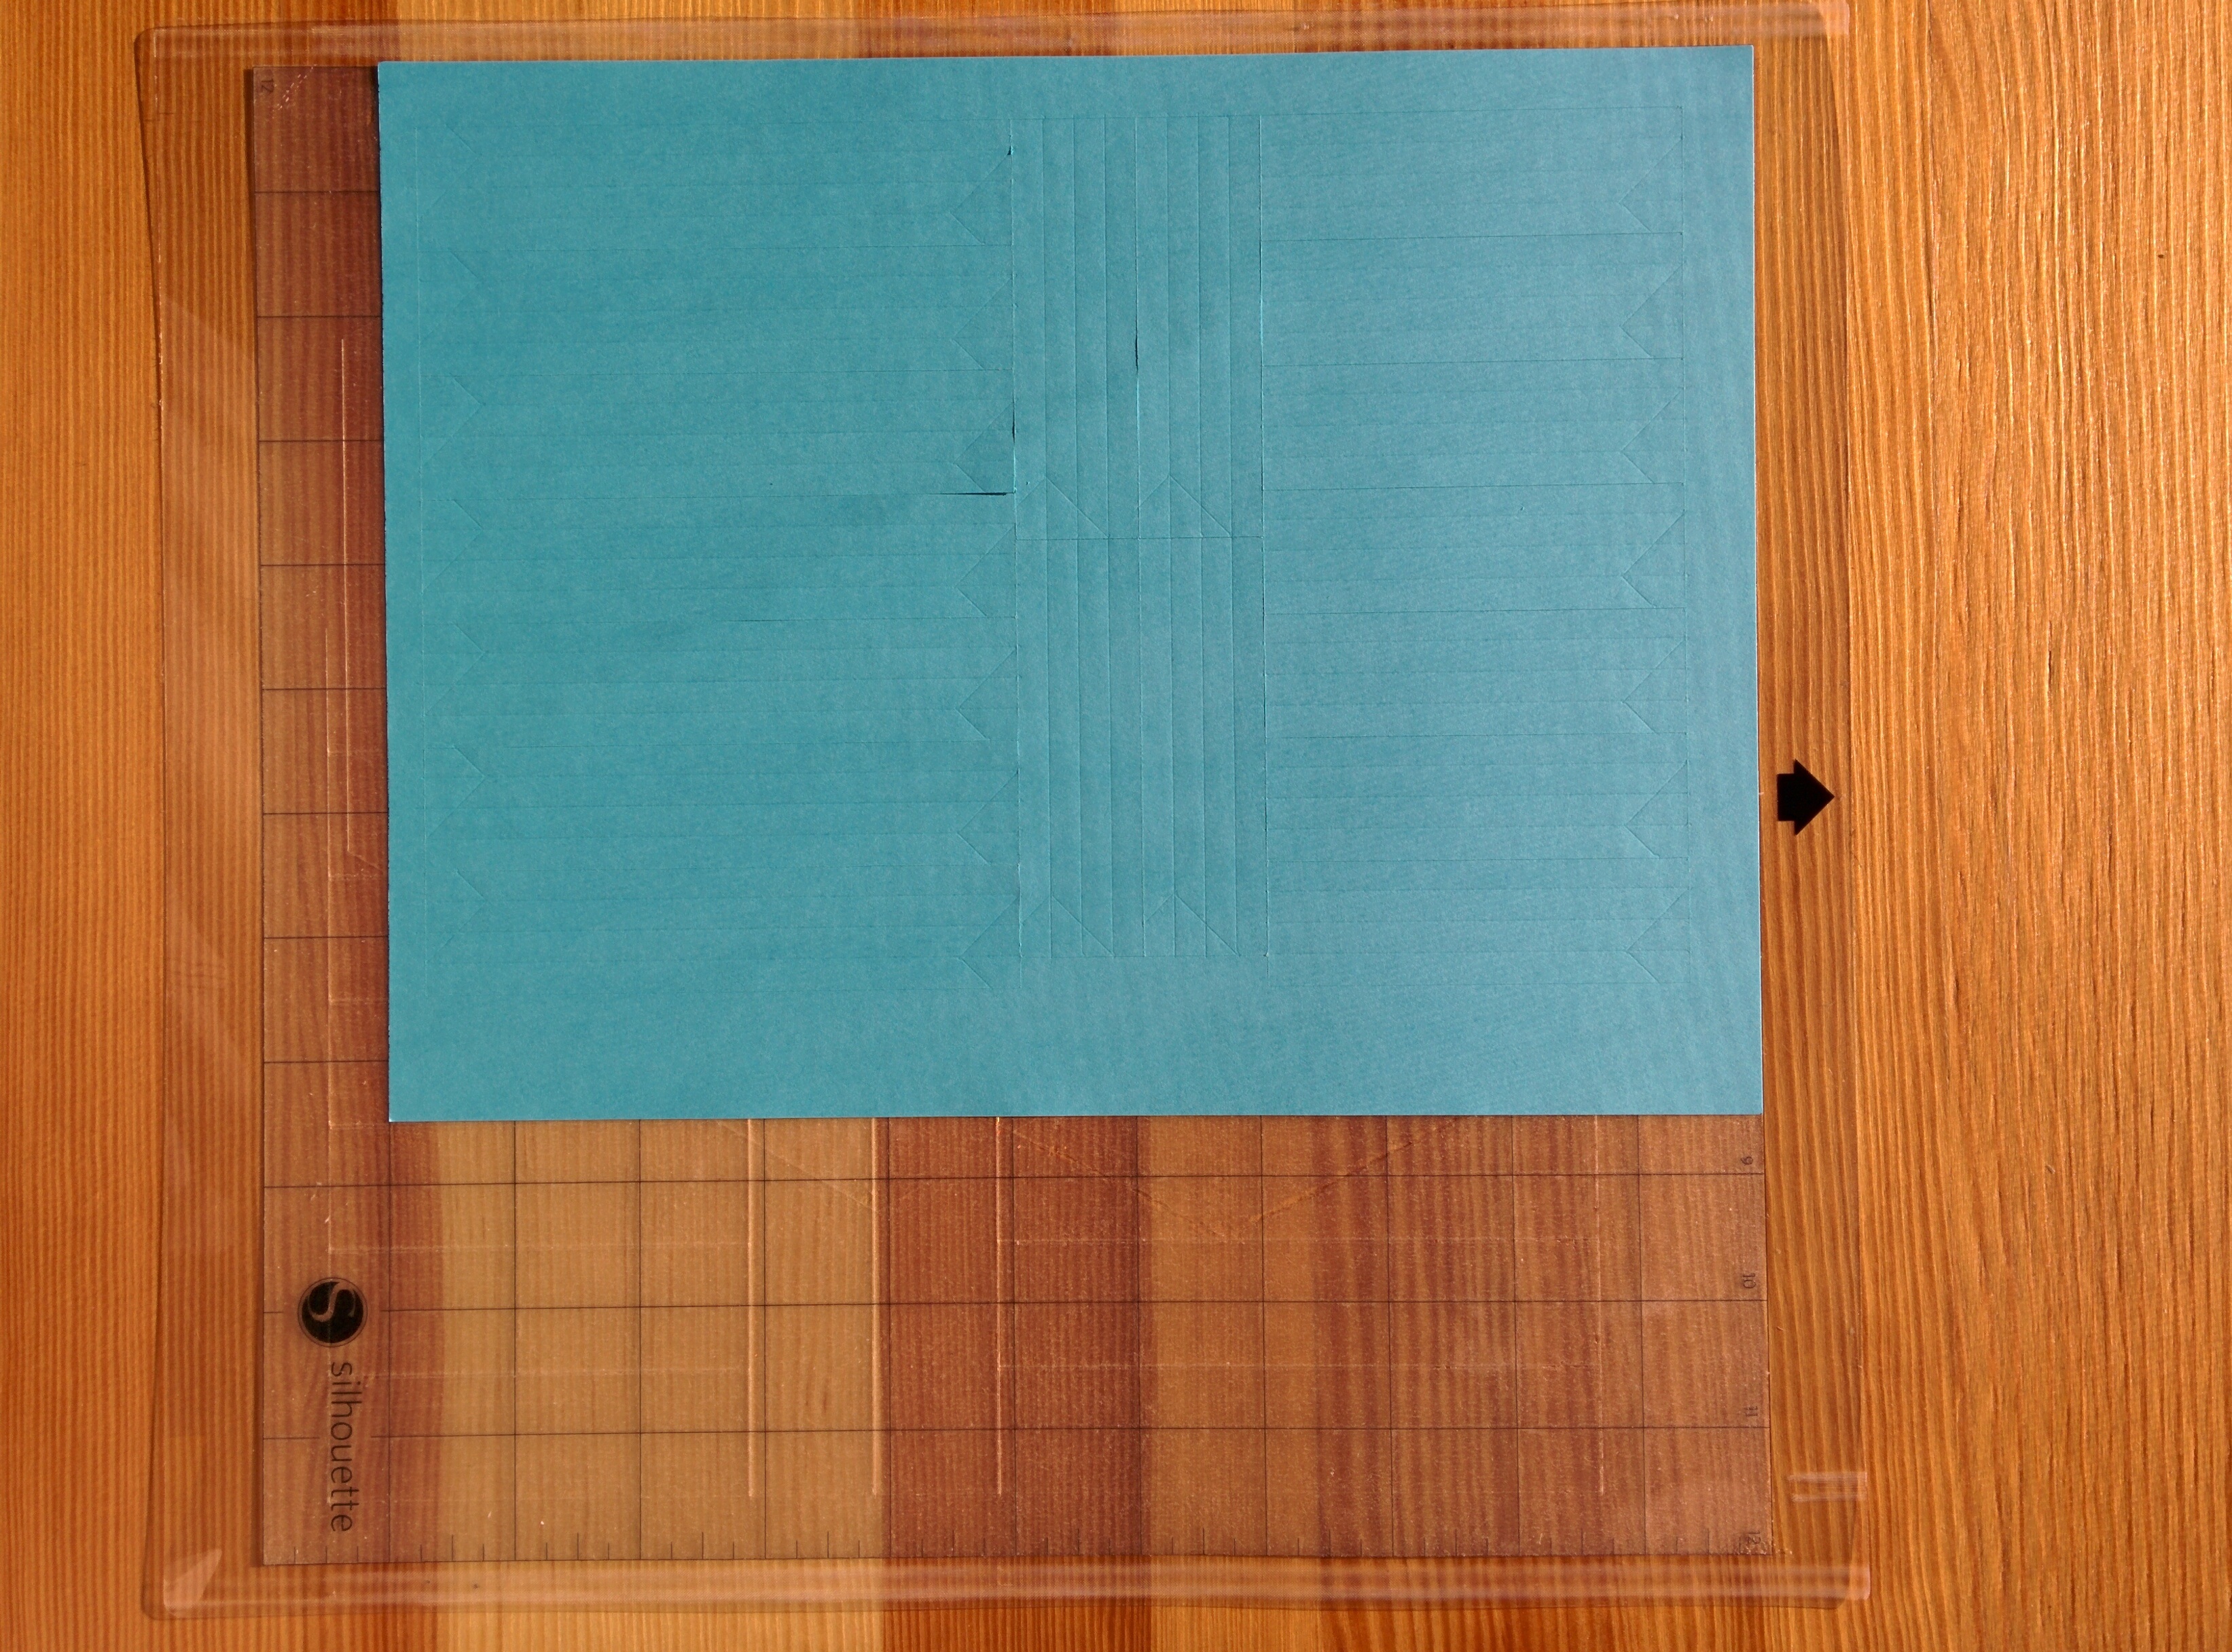
After some initial frustration and trial and error, I was able to run some jobs and found that even on the lowest setting blade, i.e. farthest blade distance for the shallowest cut, the Cameo was cutting through 24lb copy paper. I considered some hacky solutions8 but found out about the embossing tip and tried that first. I was able to get reasonably precreased square and triangle grids using the embossing tip with the following caveats:
- The creases don’t have a strong orientation so you have to actually fold the crease if you want to use it
- The creases are a little wider than ideal so air-folding along the creases can lead to a little imprecision
- Peeling the paper off the cutting mat curls the paper and some of the adhesive remains on the paper
- You need a bright light to see the creases
- Thin paper, e.g. glassine, gets stuck on the cutting mat and tears when you pull it off
- Paper size is limited to the mat size, which is 12 inches
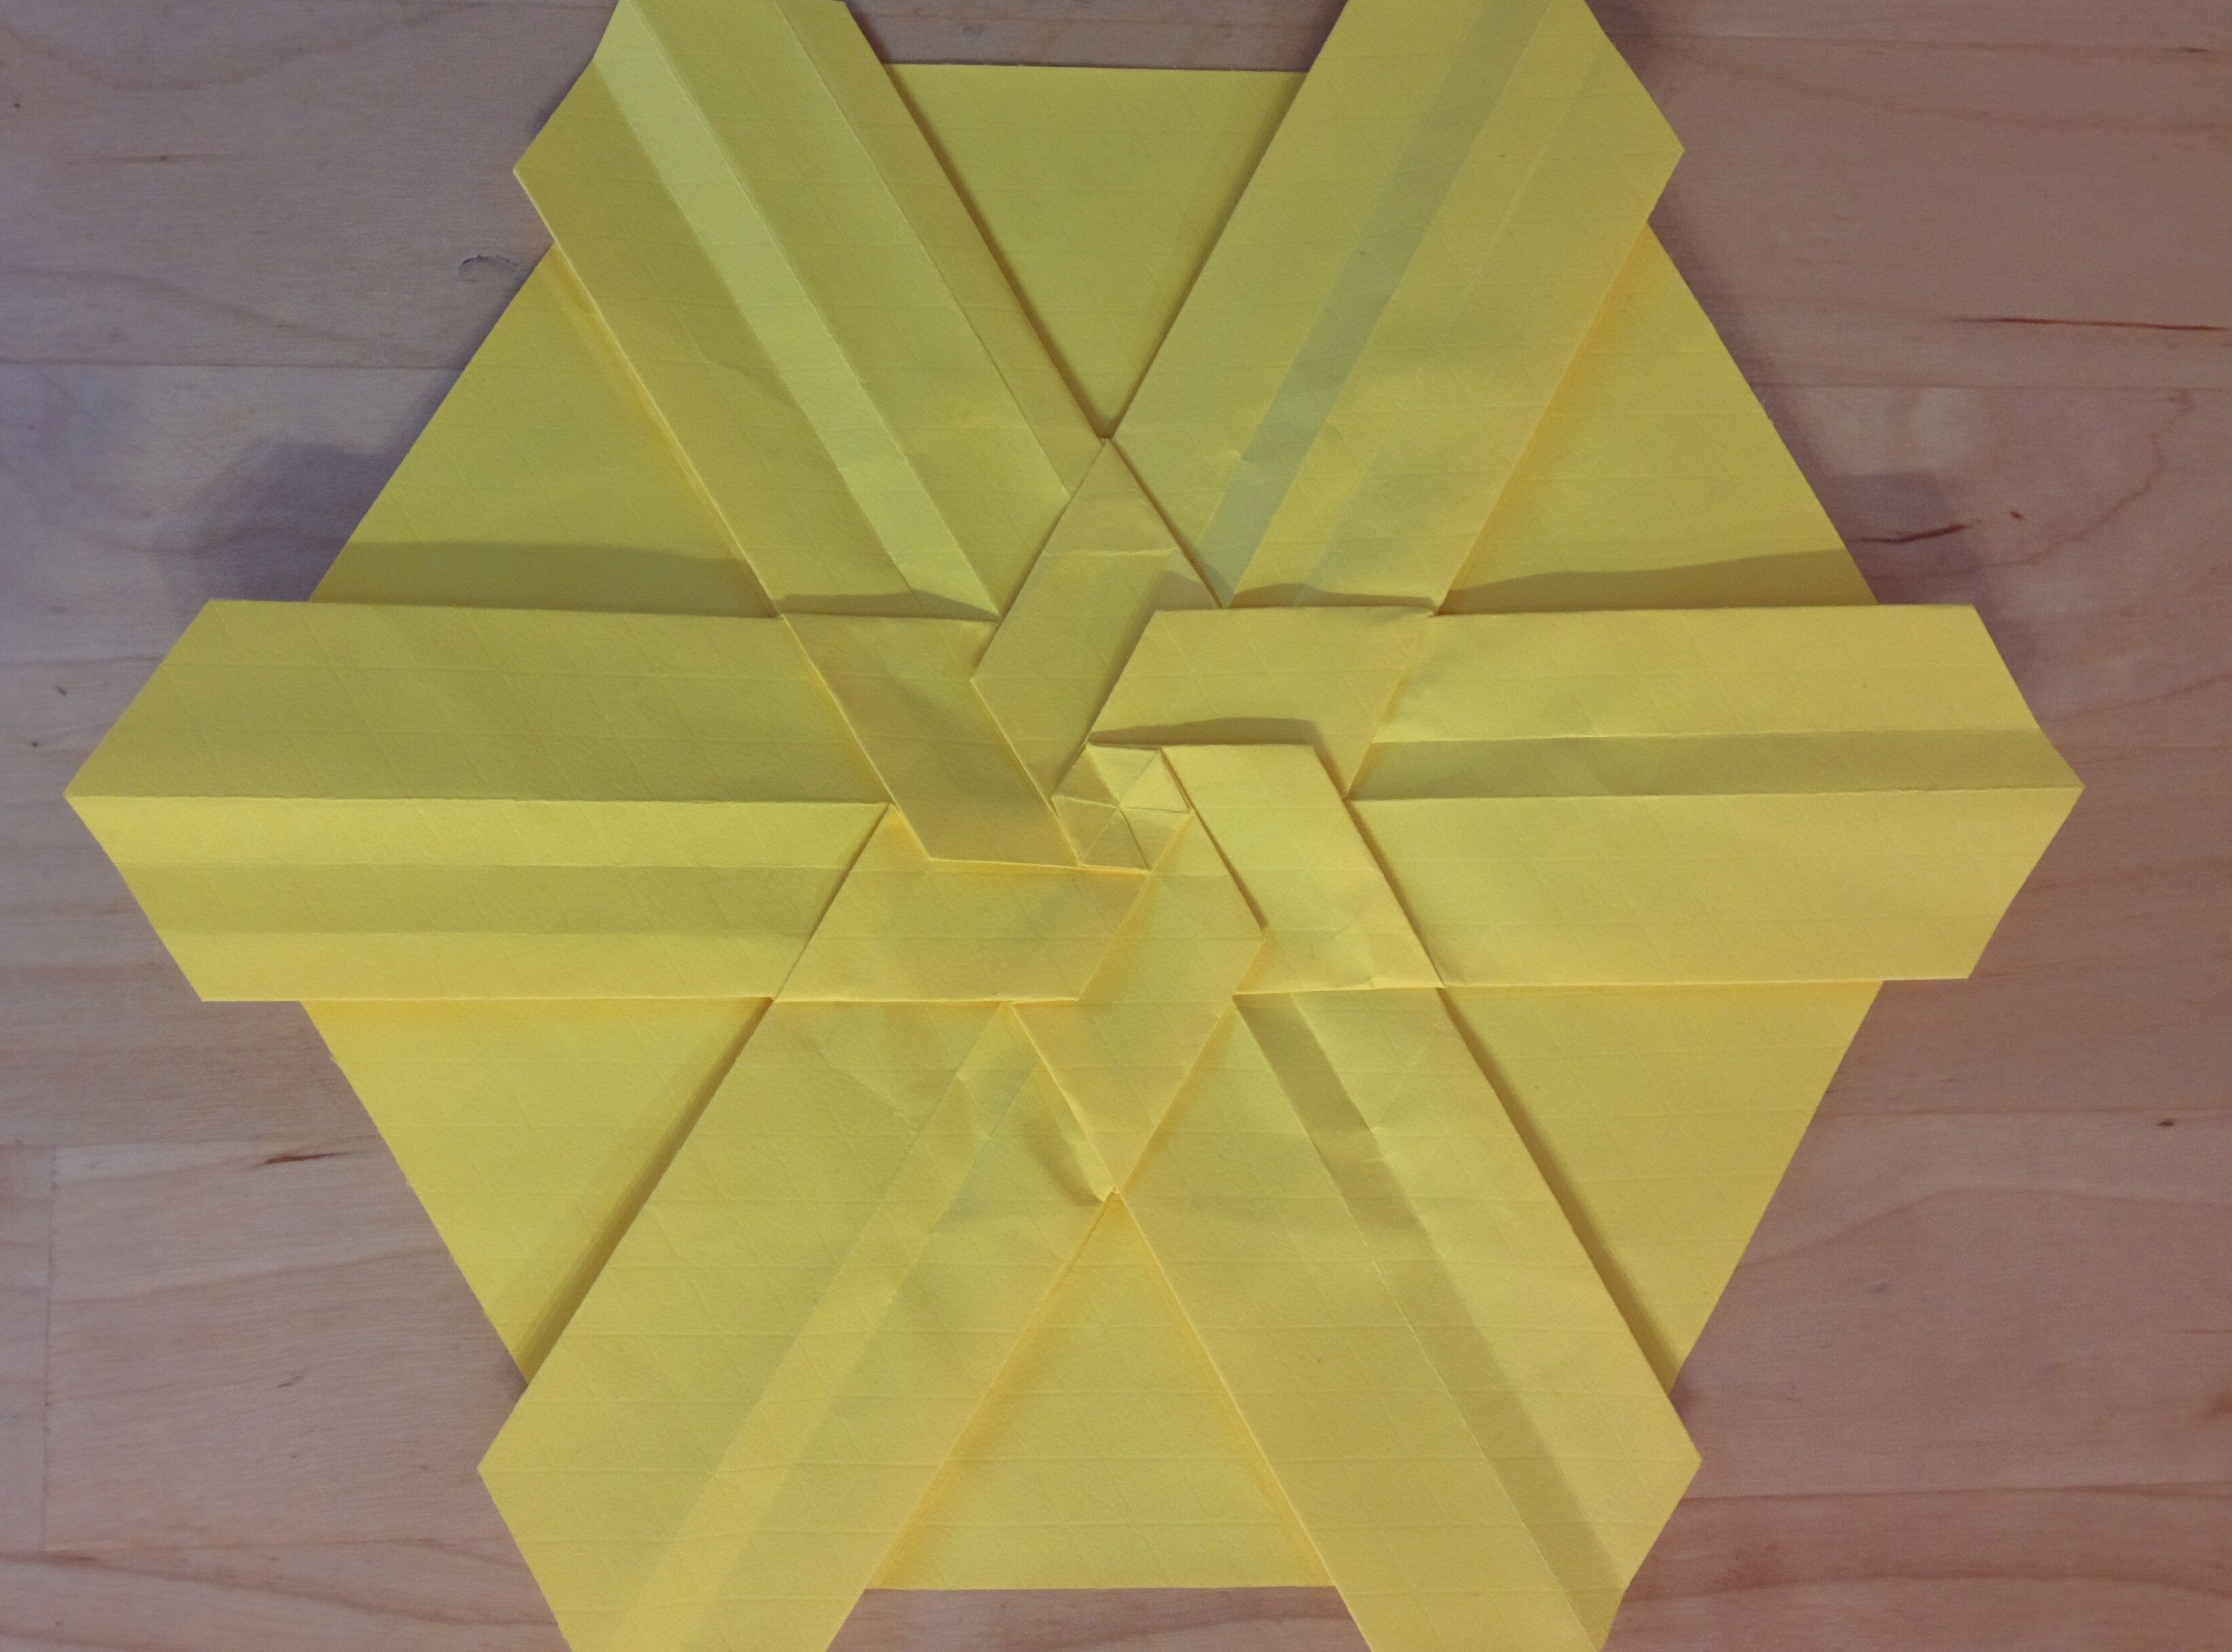
Given these caveats, I found the precreased grids on 32lb copy paper9 super-convenient for prototyping tessellations. Since I’m working through the Gjerde book, my focus is on learning the models and not creating display-worthy pieces. For modulars, I had no issues creating Cameo files to cut and partially precrease units10.
This is everything I bought:
- Silhouette Cameo 3
- \$250
- https://www.ebay.com/itm/Silhouette-Cameo-3-Bluetooth-SHIPS-WORLDWIDE-/191982753991
- I went with the newer Cameo 3 vs the older Cameo 2 for better future support, but the Cameo 2 should perform comparably
- Silhouette embossing tip
- \$8
- https://www.amazon.com/gp/product/B00YU7UE00
- Intended for embossing/debossing, but I used it for creasing
- Cricut cutting mat (12″x12″, 2 pack)
- \$10
- https://www.amazon.com/gp/product/B00BSK750Y
- Cricut is a competing brand of cutting plotters that has compatible mats. Having multiple mats lets you setup/finish the next/previous job while one is running. Plus, if you’re like me, you’ll scratch up the mat that came with the Cameo by mis-configuring jobs to cut too deeply
Here are some pictures of what I was able to do with the Cameo. You can click any picture to bring up a larger version with captions.


Cameo advice
- Decrease the stickiness of the cutting mat by applying and peeling off a t-shirt several times
- Spend an hour or two printing a large batch of grids so you always have some on hand
- Use my Cameo files as a starting point
Things to try
- I haven’t tried thicker paper, e.g. elephant hide or watercolor, yet but expect it should work well on the Cameo with the blade
- It should be possible to precrease, flip the paper, and precrease again for correct mountain/valley crease orientation
- Learning how to use a laser cutter and going to open hours at a maker space
References
- https://www.amazon.com/Origami-Tessellations-Awe-Inspiring-Geometric-Designs/dp/1568814518
- https://www.amazon.com/Mind-Blowing-Modular-Origami-Polyhedral-Innovative/dp/4805313099
- http://www.origamitessellations.com/2013/02/how-to-pre-creasing/
- http://mitani.cs.tsukuba.ac.jp/en/cp_download.html
- Plotters are machines that use pens to draw on paper. Cutting plotters replace the pen with a knife
- https://origamiusa.org/thefold/article/pre-scoring-machines-demystified
- https://www.fatcatfablab.org/
- I considered purposely dulling the blade (dangerous), stacking layers (even if secured, the top layer slides. bottom layer still cut), creating a custom knife (pen points, paper clip, 3D print one)
- 24lb and 32lb copy paper is good enough for most modulars and for practicing tessellations
- It’s tricky to draw some crease lines because Silhouette Studio is fairly limited: no direct support for angle-splitting, limited granularity of the background grid you can snap to, decimal precision of all lengths limited to 3 places. Alternatively, you can draw your image with another software program and then import it into Silhouette Studio as an .svg